> ## Documentation Index
> Fetch the complete documentation index at: https://rive-transitions-2.mintlify.site/llms.txt
> Use this file to discover all available pages before exploring further.
# Rive MCP Integration
export const YouTube = ({id, timestamp}) => {
const videoSrc = timestamp ? `https://www.youtube.com/embed/${id}?start=${timestamp}` : `https://www.youtube.com/embed/${id}`;
return ;
};
MCP integration is currently available only in the desktop Editor for Windows and macOS.
You can connect the Rive Editor to AI tools through MCP (Model Context Protocol). The first set of tools are designed to let AI handle repetitive tasks, like creating complex View Models, State Machines with hundreds of states/layers, Layouts, Shapes, and more.
### Supported Features
* **Create and manage Rive files** — add, rename, resize, arrange, and focus artboards.
* **Inspect and edit the scene** — query hierarchies, select objects, update properties, rename, duplicate, reorder, reparent, or delete elements.
* **Build designs** — create shapes, paths, layouts, component instances, component lists, and asset-based elements.
* **Create animation and interaction** — edit linear animations, state machines, states, transitions, conditions, keyframes, and interpolation.
* **Work with data binding** — create view models, properties, instances, bindings, and custom property groups.
* **Edit scripts and shaders** — manage Luau scripts and WGSL shaders, update source code, run diagnostics, recompile, test, search code, and read console output.
This list of features will evolve over time as more tools are added.
## Installation
### Using Cursor
Install and open the latest version of the [Rive](https://rive.app/downloads) desktop app for Mac or Windows.
Create a [Cursor](https://www.cursor.com/) account and install the app.
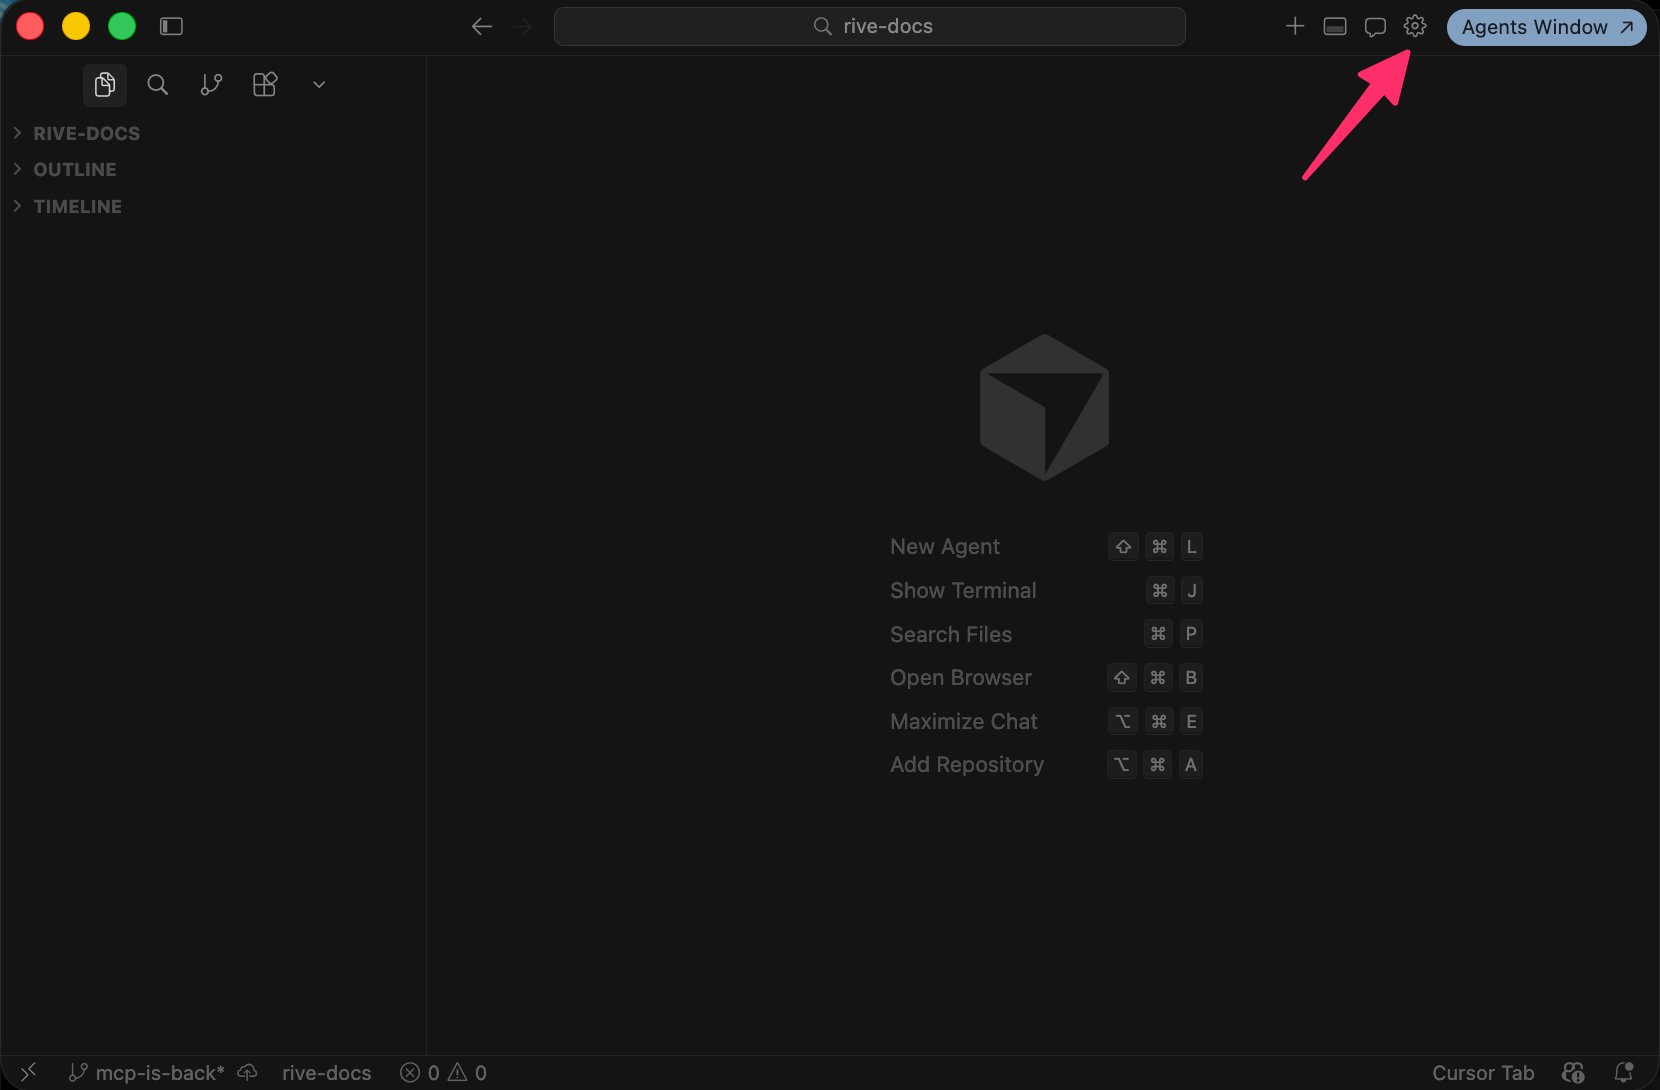
Open Cursor and navigate to the settings panel in the top right corner.
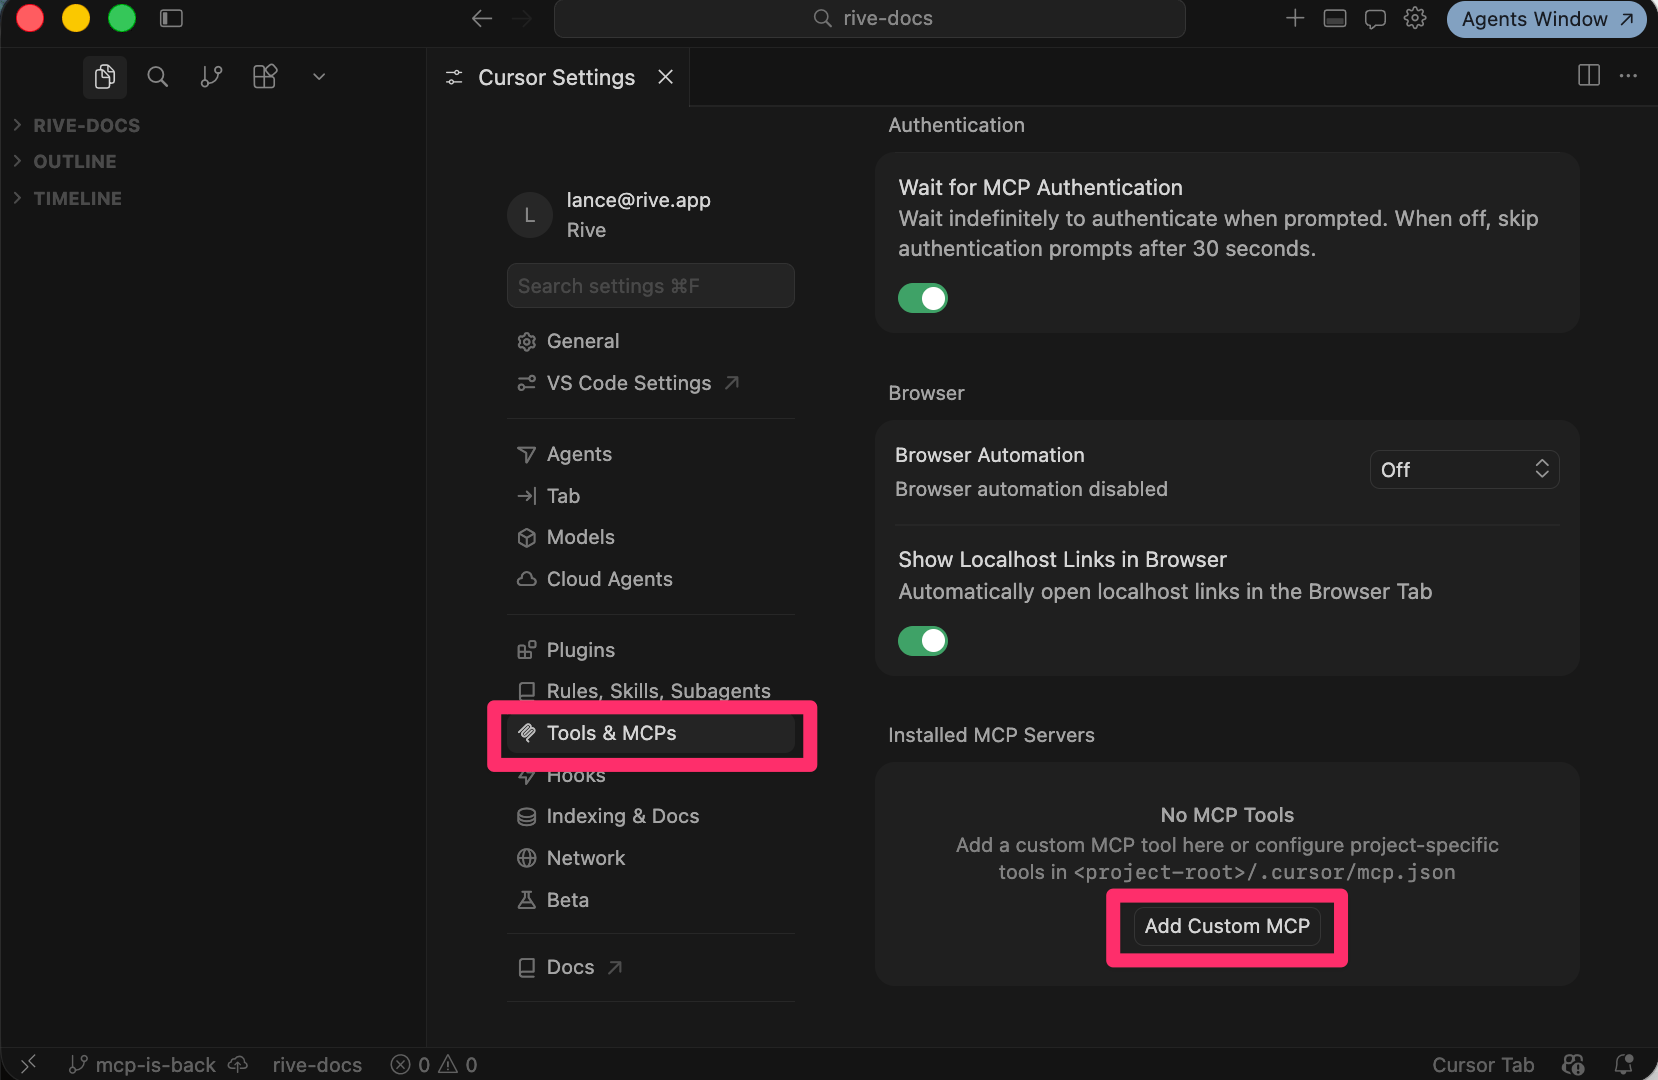
 Open the Tools & MCPs tab and click Add Custom MCP.
 Save the following JSON snippet to your computer as `mcp.json`.
```json theme={null}
{
"mcpServers": {
"rive": {
"url": "http://127.0.0.1:9791/mcp"
}
}
}
```
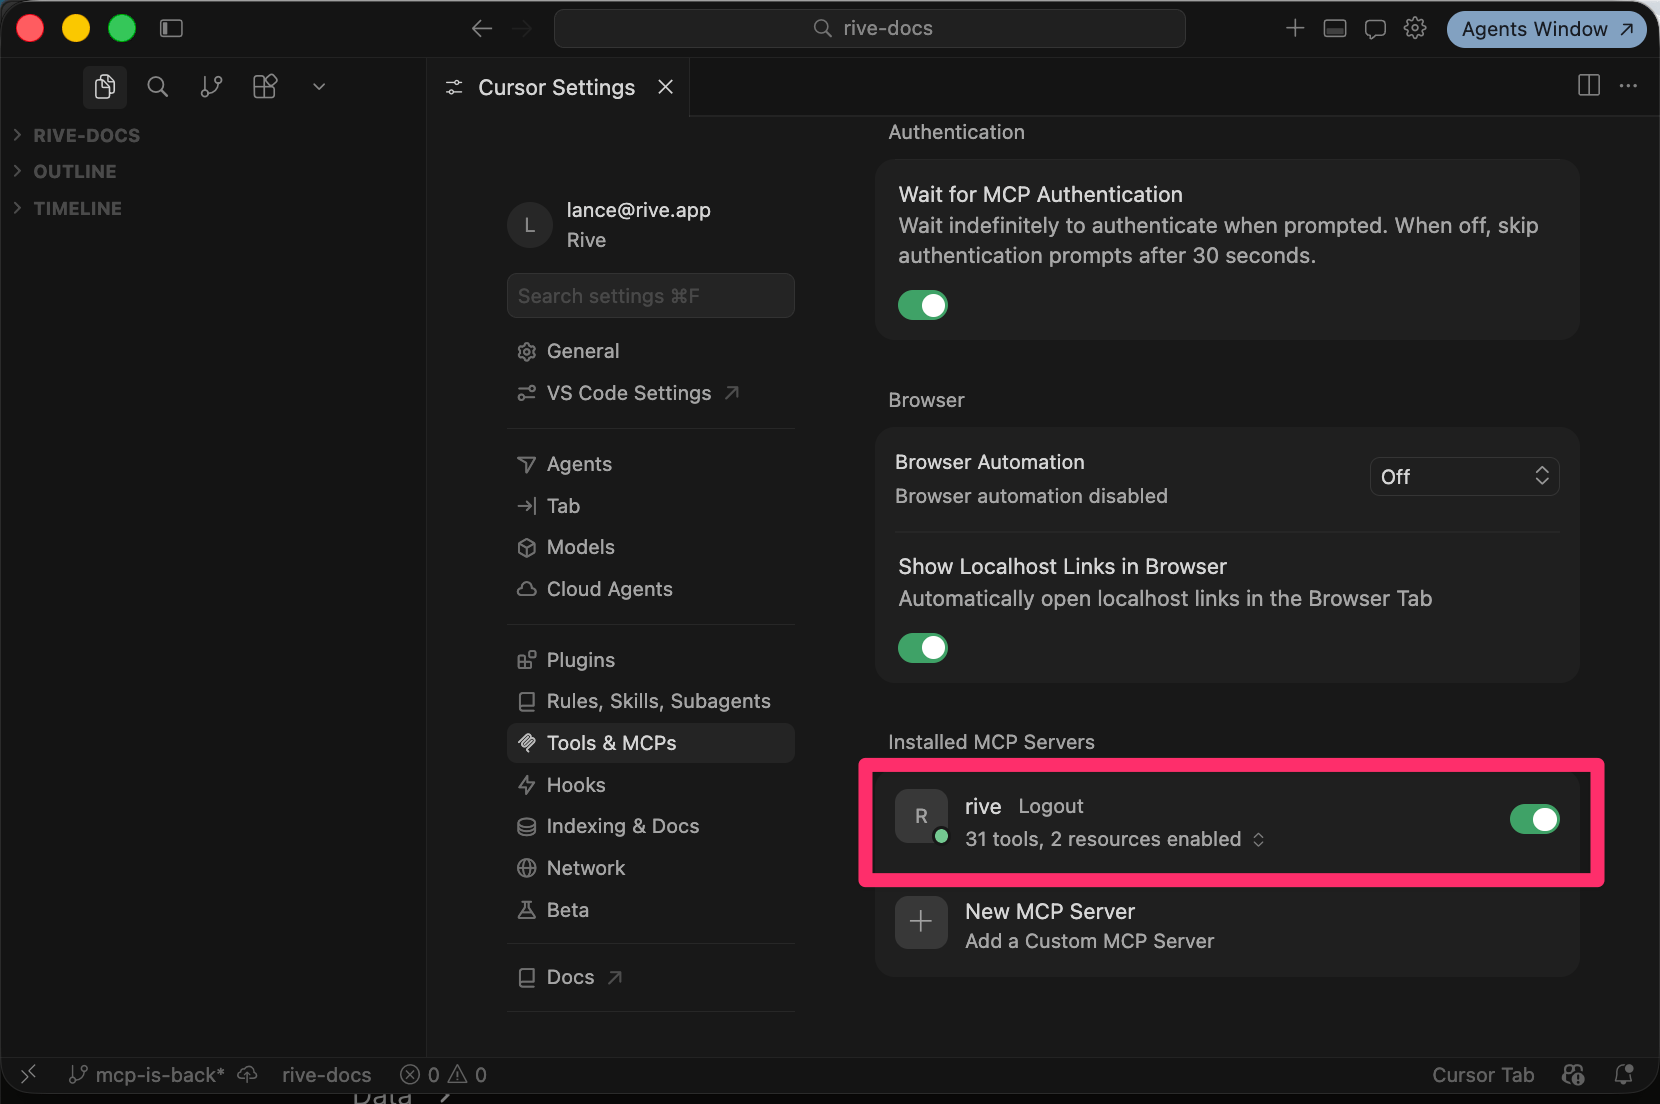
Turn the MCP connection `On`
If everything was installed correctly, you should see Rive as an available MCP server.
Save the following JSON snippet to your computer as `mcp.json`.
```json theme={null}
{
"mcpServers": {
"rive": {
"url": "http://127.0.0.1:9791/mcp"
}
}
}
```
Turn the MCP connection `On`
If everything was installed correctly, you should see Rive as an available MCP server.
 For the Rive server to be available, you must have the Rive Early Access app opened.
Additional information on setting up MCP can be found [here](https://docs.cursor.com/context/model-context-protocol).
### Using Claude in Terminal
Install and open the latest version of the [Rive desktop app](https://rive.app/downloads) for macOS or Windows.
Run the following command in your terminal:
```shell theme={null}
claude mcp add --transport http rive http://127.0.0.1:9791/mcp
```
Run Claude and follow the prompts:
```shell theme={null}
claude
```
## What can it do?
Once Cursor is installed and everything is set up correctly, it's time to start prompting the AI.
Have a Rive File open and an Artboard created.
Type your prompt into the chat UI and hit enter. The AI will take a moment to process the request.
Example prompt:
```
Create a State Machine about birds with 20 states and 2 layers
```
Once the request has been processed, type **End Prompt** to allow the AI to make changes to the Rive file.
For the Rive server to be available, you must have the Rive Early Access app opened.
Additional information on setting up MCP can be found [here](https://docs.cursor.com/context/model-context-protocol).
### Using Claude in Terminal
Install and open the latest version of the [Rive desktop app](https://rive.app/downloads) for macOS or Windows.
Run the following command in your terminal:
```shell theme={null}
claude mcp add --transport http rive http://127.0.0.1:9791/mcp
```
Run Claude and follow the prompts:
```shell theme={null}
claude
```
## What can it do?
Once Cursor is installed and everything is set up correctly, it's time to start prompting the AI.
Have a Rive File open and an Artboard created.
Type your prompt into the chat UI and hit enter. The AI will take a moment to process the request.
Example prompt:
```
Create a State Machine about birds with 20 states and 2 layers
```
Once the request has been processed, type **End Prompt** to allow the AI to make changes to the Rive file.