> ## Documentation Index
> Fetch the complete documentation index at: https://rive-transitions-2.mintlify.site/llms.txt
> Use this file to discover all available pages before exploring further.
# Audio Assets
> Import, clip, and configure audio assets in Rive.
export const VideoEmbed = ({src}) => {
return
;
};
## Importing Audio
See [Importing Assets](/editor/fundamentals/assets-overview#importing-assets) for information about importing files, including MP3, WAV, and FLAC files.
### Browse Sounds
Browse Sounds gives you direct access to a free library of over 3,000 sounds from Soundly.
In the Assets panel, click **+** and select **Browse Sounds**.
In the Sounds panel, search or browse for a sound.
Preview the sound, then click **+** to add it to the Assets panel.
After adding a sound to the Assets panel, you can use it in an [Audio Event](/editor/events/audio-events) or reference it from a [script](/scripting/getting-started).
## Export Options
Audio assets include a **Source** option that controls the audio format used for export.
* **Source**: Use the original imported audio format.
* **WAV**: Export the audio as WAV.
* **FLAC**: Export the audio as FLAC.
* **MP3**: Export the audio as MP3.
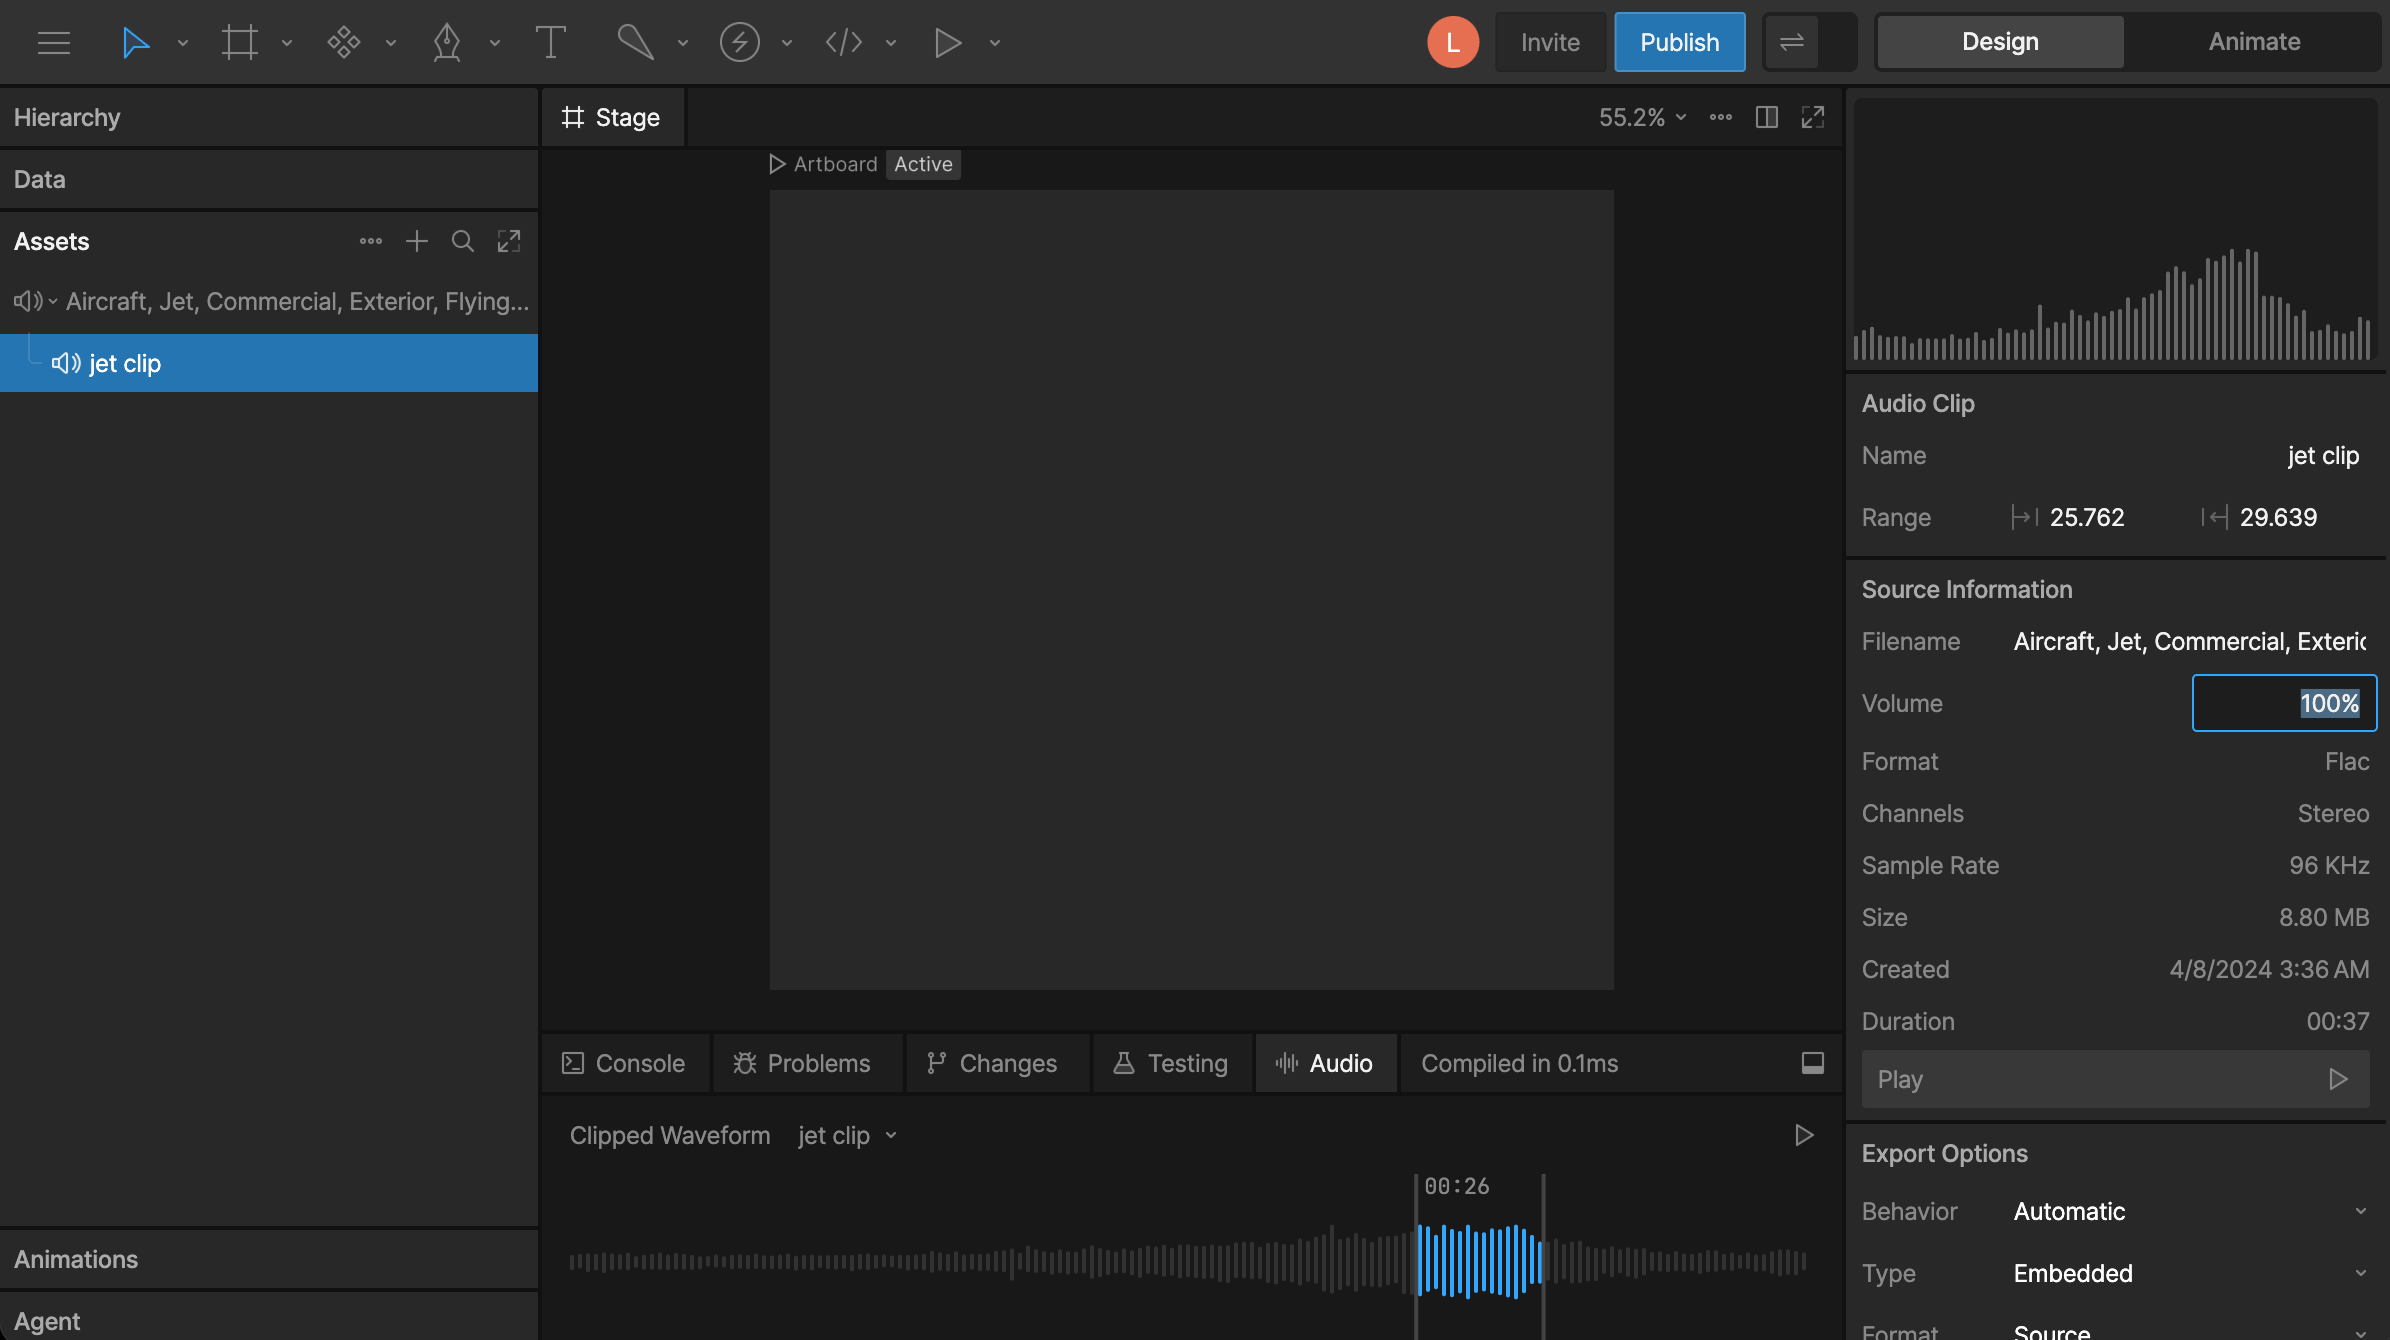
## Creating Clips
You can create a shorter clip from any audio asset.
Open the **Audio** panel in the **Debug Panel**.
Select an audio asset in the **Assets** panel.
Drag along the waveform to select a portion of the audio and click the play button to preview.
Click **+** to create a clip.
The new clip will now appear as its own audio asset under the parent audio in the sidebar.
## Setting Asset Volume
Select an audio asset or clip to set its **Volume** in the Inspector.
Volume is set on the asset, not on each individual use of the asset. If the same audio asset is used in multiple places, changing its volume affects all of them.