Path
The direction the transition travels.Example: A character might have one path from Idle to Walk, and another from Walk back to Idle.
Conditions
When the transition occurs.Example: A character might transition to Walk when a button is pressed, then back to Idle when the button is released.
Properties
How the transition behaves.Example: You might set the transition duration to
0.2 seconds so the change between states feels smoother.Actions
Extra behavior to perform when the transition occurs.Example: A transition might fire an event, set a property value, or align a target.
Transition Path
A transition path determines how the State Machine moves from one state to another. To create a transition path, move your cursor near the state you want to leave until the circle appears. Click and drag from the circle to the state you want to transition to.
Transition Conditions
Conditions determine when a transition can occur.Without conditions, transitions fire as soon as they are reached. This can cause a State Machine to rapidly move between states or skip directly to a single animation.
Adding a Condition
To add a condition to a transition, select the transition, then click the plus button next to Conditions. A condition has three parts:- Source value - the value or event the condition watches
- Operator - how the source value is compared
- Comparison value - the value the source value is compared against
isWalking is true.
In this condition, isWalking is the source value, equals is the operator, and true is the comparison value.
The Source Value
Conditions can be driven by many different sources, including:- View Model properties
- Events
- Built-in properties such as artboard width, height, and ratio

The Operator
Conditions can use comparisons such as equals, does not equal, greater than, greater than or equal to, less than, and less than or equal to. The available comparisons depend on the type of value being compared.
Comparison Value
The comparison value is the value the source value is compared against.
true, 100, or "mobile". You can also data bind the comparison value to another property, allowing the transition to compare against dynamic data.
For example, a transition might occur when speed is greater than a data-bound walkThreshold value.
Adding Multiple Conditions
You can add multiple conditions to a single transition. All conditions must be met before the transition occurs.
Transition Properties
Once you’ve added a transition, selecting the direction indicator will allow you to configure the transition. There are three different sections to the transition panel, the transition properties, conditions, and interpolation.Selecting multiple transitions allows you to update multiple properties at once.
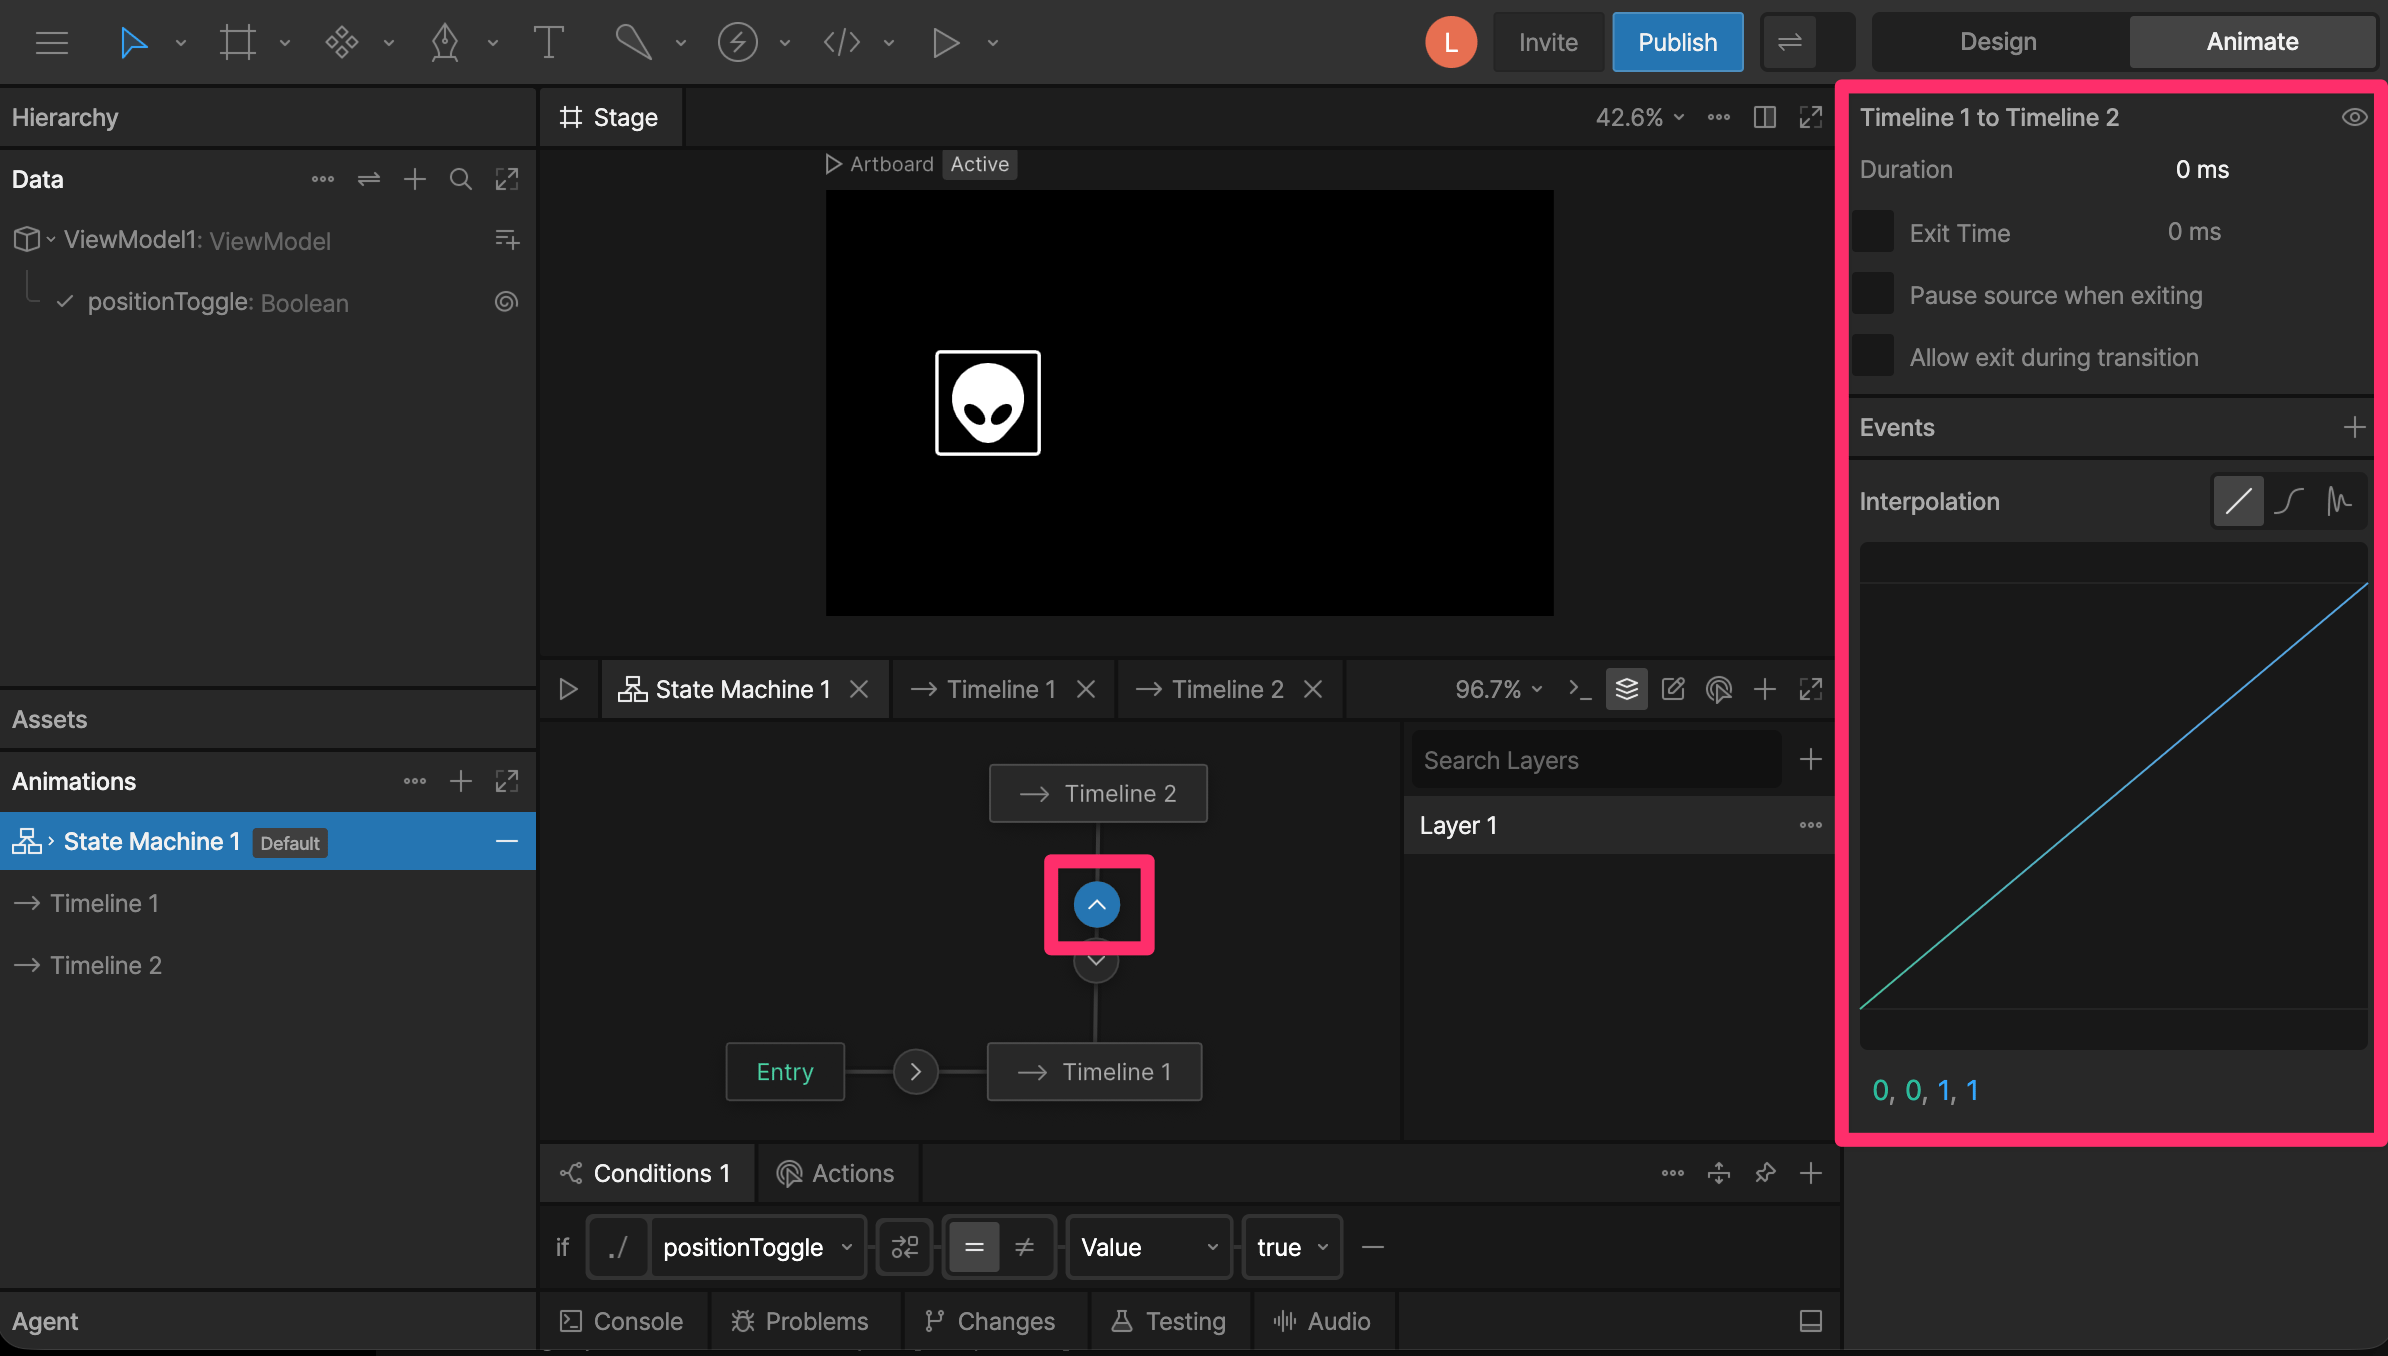
Duration
The duration property describes how long it takes for a transition to occur. The duration is set to zero by default, meaning the transition happens immediately. So, when we transition between these two animations, it appears as though the object snaps from one side of the artboard to the other.Exit Time
Exit Time tells the state machine how much of the state must play before transitioning. By default, Exit Time is unchecked. To enable Exit Time, use the checkbox. Once the setting is enabled, you can use either a time value or percent. For example, if you want the state machine to play the entire animation before transitioning, you can either enter the duration of the animation, or use 100%.
Pause Source When Exiting
Pause Source When Exiting pauses the animation in the state you are leaving while the transition plays. In this example, the up-and-down motion pauses as soon as the transition begins.
Allow Exit During Transition
Allow exit during transition controls whether the State Machine can leave a transition before that transition finishes. For example, if a button is transitioning from Idle to Hover and the user moves their cursor away, Allow exit during transition lets it transition back to Idle immediately.
Interpolation
You can add interpolation to your transition at the bottom of the Transitions Panel. By default, the interpolation is set to linear, but you can use the cubic and other interpolations. If you are unfamiliar with the basics of Interpolation, see Interpolation (Easing).Actions
Transitions can also perform actions when the transition occurs. Unlike conditions, which determine whether a transition can happen, actions perform an operation when the transition is triggered. Actions can be used to:- Set property values
- Report events
- Align targets
- Control focus
- Fire a scripted action
Actions can also be fired at the start or end of a state.See State Actions.
Creating an Action
Add an action
With a transition selected, go to the Actions tab, click the
+ button, and select an action type.Action Timing
Each action can run at either:- Start — Runs when the transition begins
- End — Runs after the transition completes
Disabling a Transition
You can temporarily disable a transition without deleting it. Disabling is useful when you want to isolate part of a state machine for testing, or temporarily remove a path without losing its configuration. There are two ways to toggle a transition’s enabled state:- From the transition panel: select the transition and click the enable/disable icon in the panel.
- From the canvas: right-click the transition and choose Disable transition (or Enable transition if it’s already disabled).